Japanese Curry Rice in an Electric Pressure Cooker (Easy Home Recipe)
Japanese curry rice — kare raisu — is one of the most popular home-cooked meals in Japan. Almost every Japanese household has a box of curry roux in the pantry, and everyone has their own way of making it. This is mine: cooked in an electric pressure cooker, almost entirely hands-off, ready in a fraction of the usual time. (For another classic dish I make in the same pressure cooker, see my nikujaga recipe.)
I use S&B Golden Curry — medium hot. It’s the same style of curry roux that Japanese home cooks have been using for decades, and it’s widely available outside Japan too. The result is a thick, savory curry that tastes like it’s been simmered for hours. With the pressure cooker, it practically has been — just without the hours.
Why Make Japanese Curry in a Pressure Cooker?
The traditional method — sauté the meat and vegetables, add water, simmer 20 minutes, add the roux, simmer again — takes about 40 minutes of active cooking. With an electric pressure cooker, you skip the sautéing entirely, dump everything in, set it, and walk away. The vegetables come out incredibly tender and the pork is soft all the way through.
- No need to sauté first — everything goes in raw
- Vegetables are perfectly tender — pressure cooking does what 20 minutes of simmering can’t
- Mostly hands-off — set the timer and let the machine work
- Great for a busy weekend — start it while you do something else
The Curry Roux: S&B Golden Curry
In Japan, curry roux comes in blocks — you break off as many as you need and dissolve them into the cooked broth at the end. There are dozens of brands in Japan, but S&B Golden Curry is the one most widely available outside Japan and the one I recommend for home cooks in the US. It has a well-balanced, savory flavor with a hint of sweetness, and it thickens the curry to a perfect consistency.
I use the medium hot version — enough warmth to be interesting, mild enough that my wife is happy.
👉 S&B Golden Curry Sauce Mix — available on Amazon
Ingredients
Serves 4
| Ingredient | Amount |
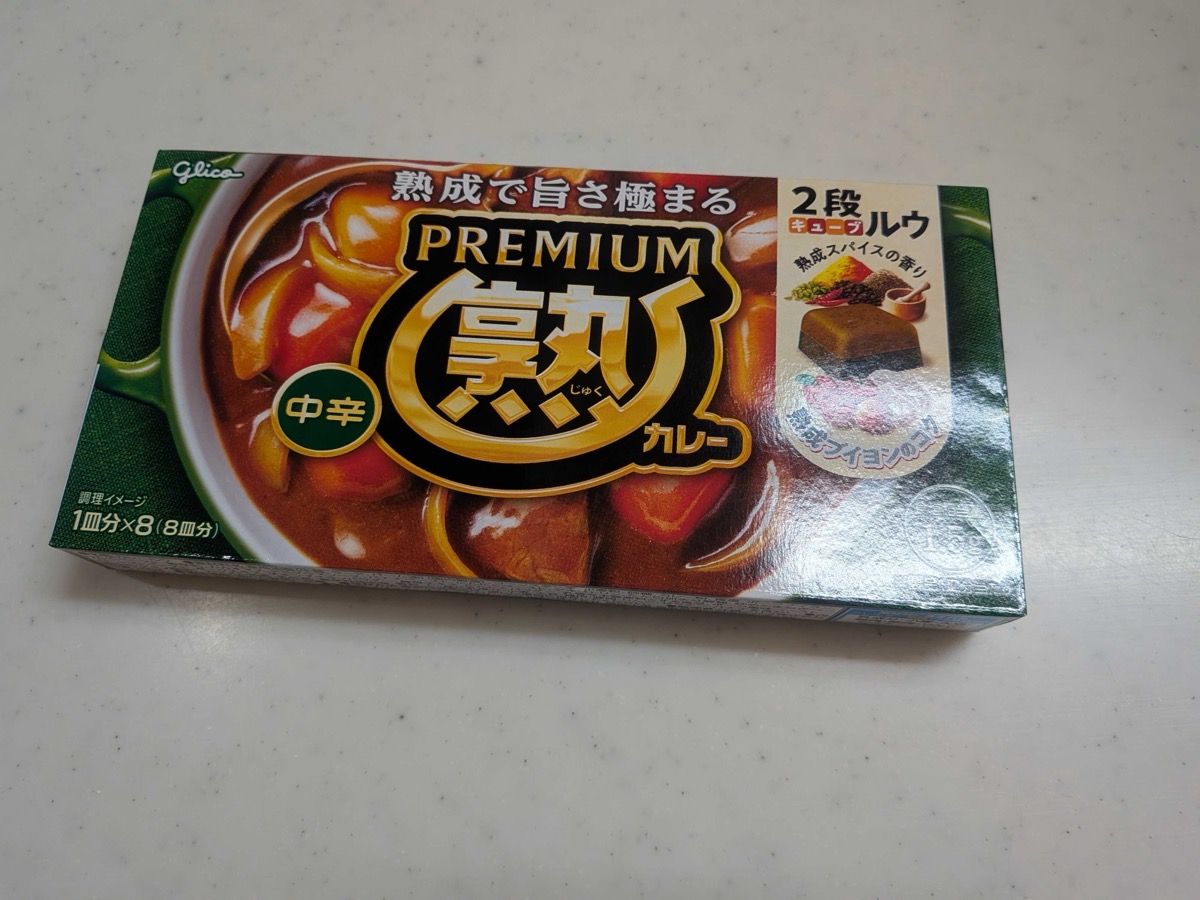
| Curry roux (Glico Premium Juku Curry or similar) | 1/2 box (80g, about 4 blocks) |
| Pork belly, cut into bite-sized pieces | 150g (5 oz) |
| Potato, peeled and cut into chunks | 1 medium (150g) |
| Carrot, cut into chunks | 1/2 medium (100g) |
| Onion, cut into wedges | 1 medium (200g) |
| Bay leaf | 1 |
| Water | 500ml (2 cups) |
A Note on the Meat
I use pork belly (豚バラ) for this curry. It’s fattier than the chicken or beef you might expect, but the fat renders beautifully under pressure and makes the curry incredibly rich. If you prefer a leaner option, pork shoulder or chicken thigh work well too.
How to Make Japanese Curry in an Electric Pressure Cooker
Step 1: Prep the Ingredients
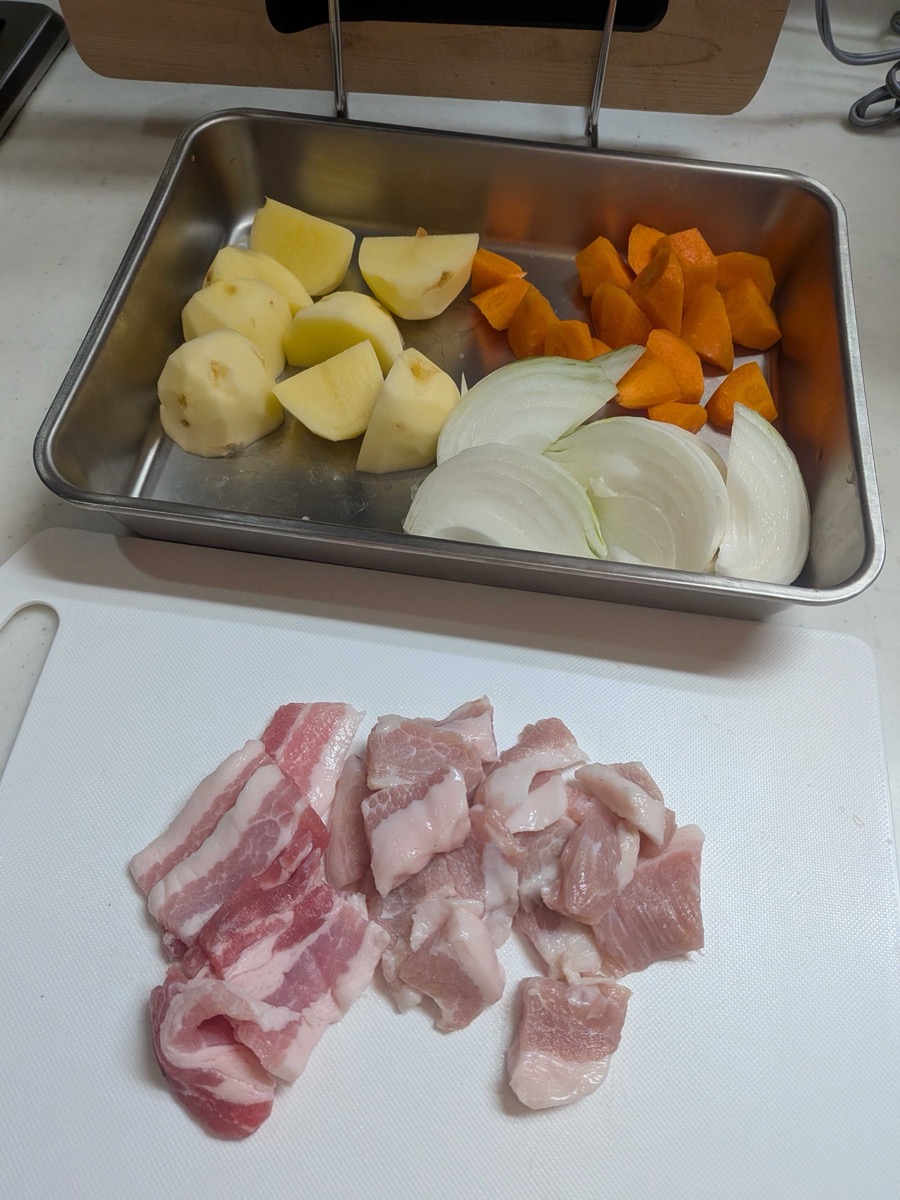
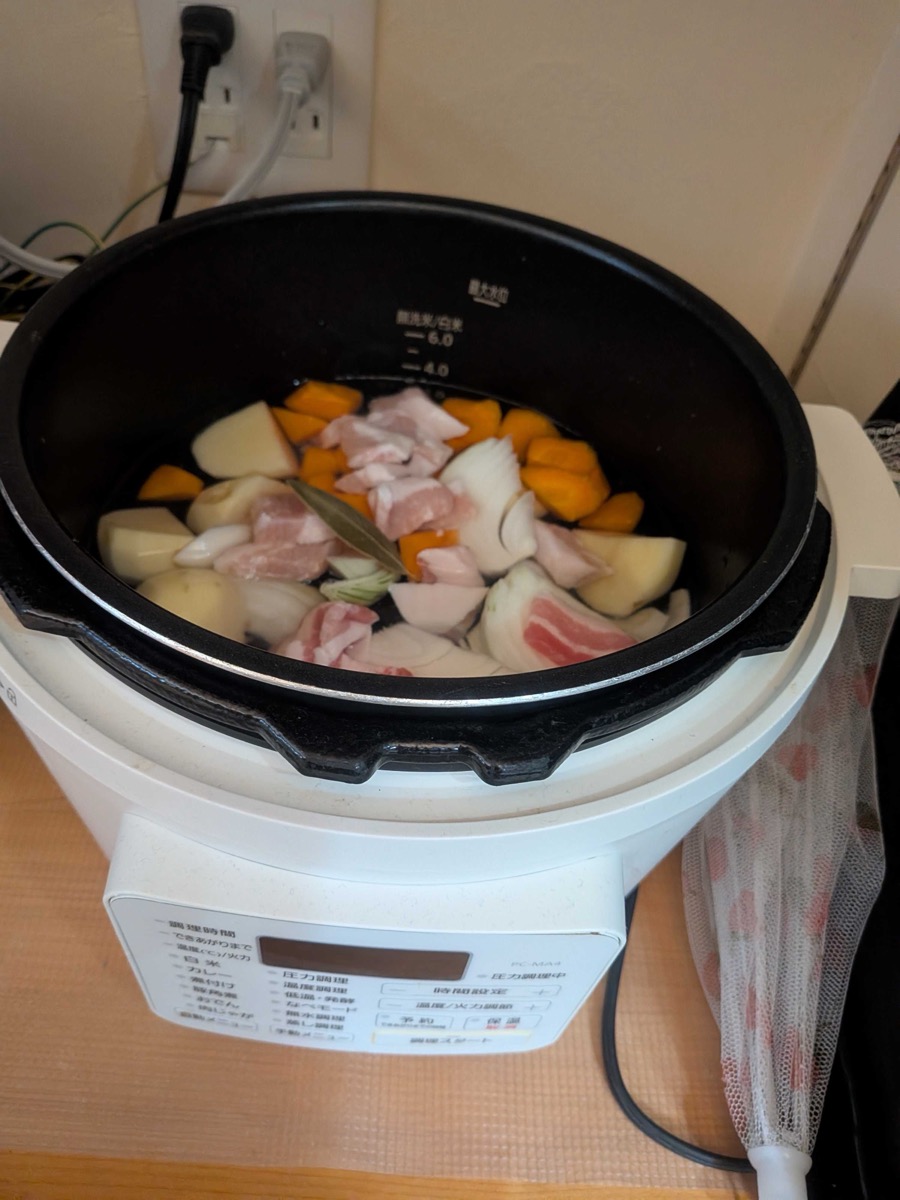
Peel the potatoes and cut into large chunks — about 4cm pieces. Cut the carrot similarly. Slice the onion into thick wedges. Cut the pork belly into bite-sized pieces, roughly 3–4cm.
No need to be precise here. Japanese home cooking is forgiving — bigger chunks hold their shape better under pressure, which I prefer.
Step 2: Load the Pressure Cooker
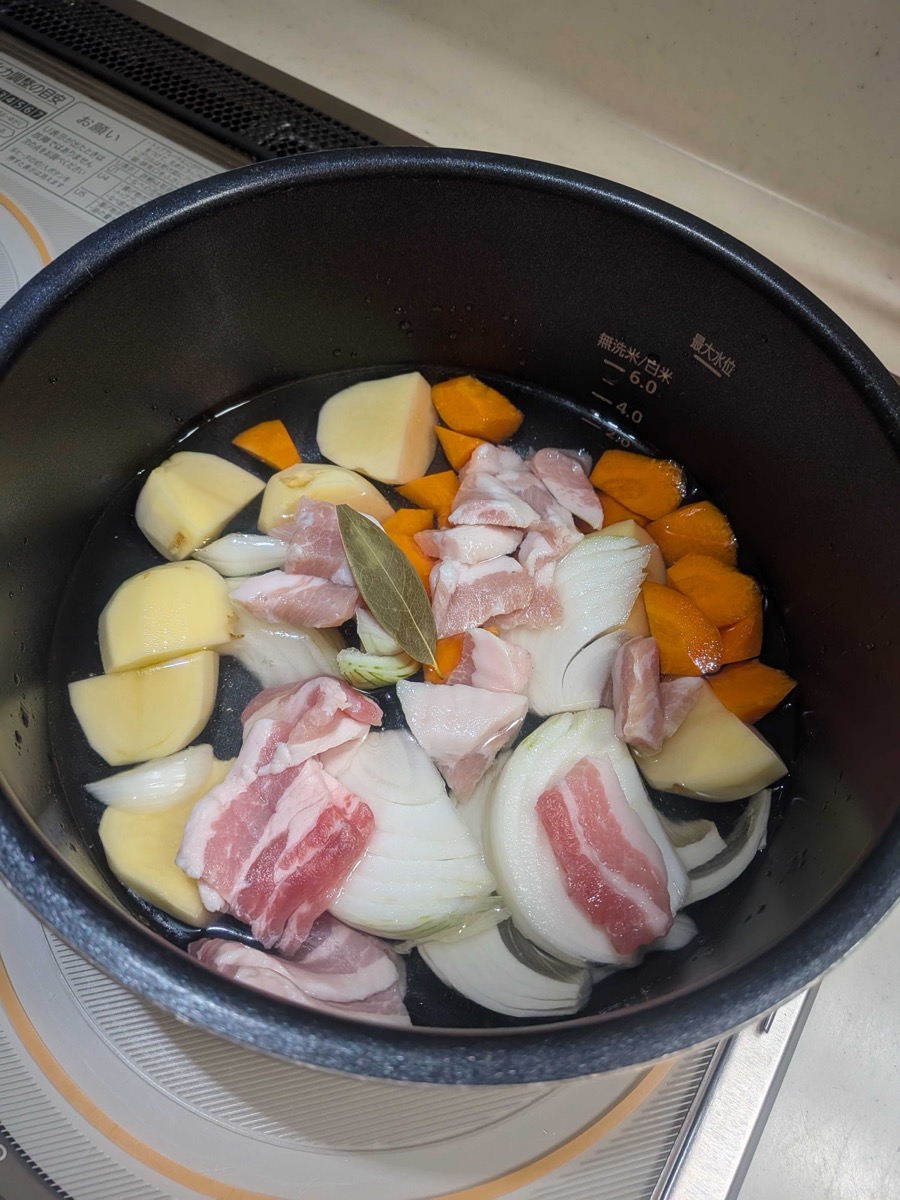
Add all the ingredients directly to the inner pot of your electric pressure cooker — pork, potatoes, carrots, onion, and a bay leaf. Pour in 500ml of water. No sautéing needed; this is one of the great advantages of pressure cooking.
Step 3: Pressure Cook
Set the pressure cooker to a high pressure setting and cook for about 10 minutes. If your cooker has a specific soup or stew mode, that works great too. Lock the lid and press start — the machine will bring the pot up to pressure and cook the ingredients until they’re completely tender, plus the time to pressurize and depressurize.
👉 Electric Pressure Cooker — available on Amazon
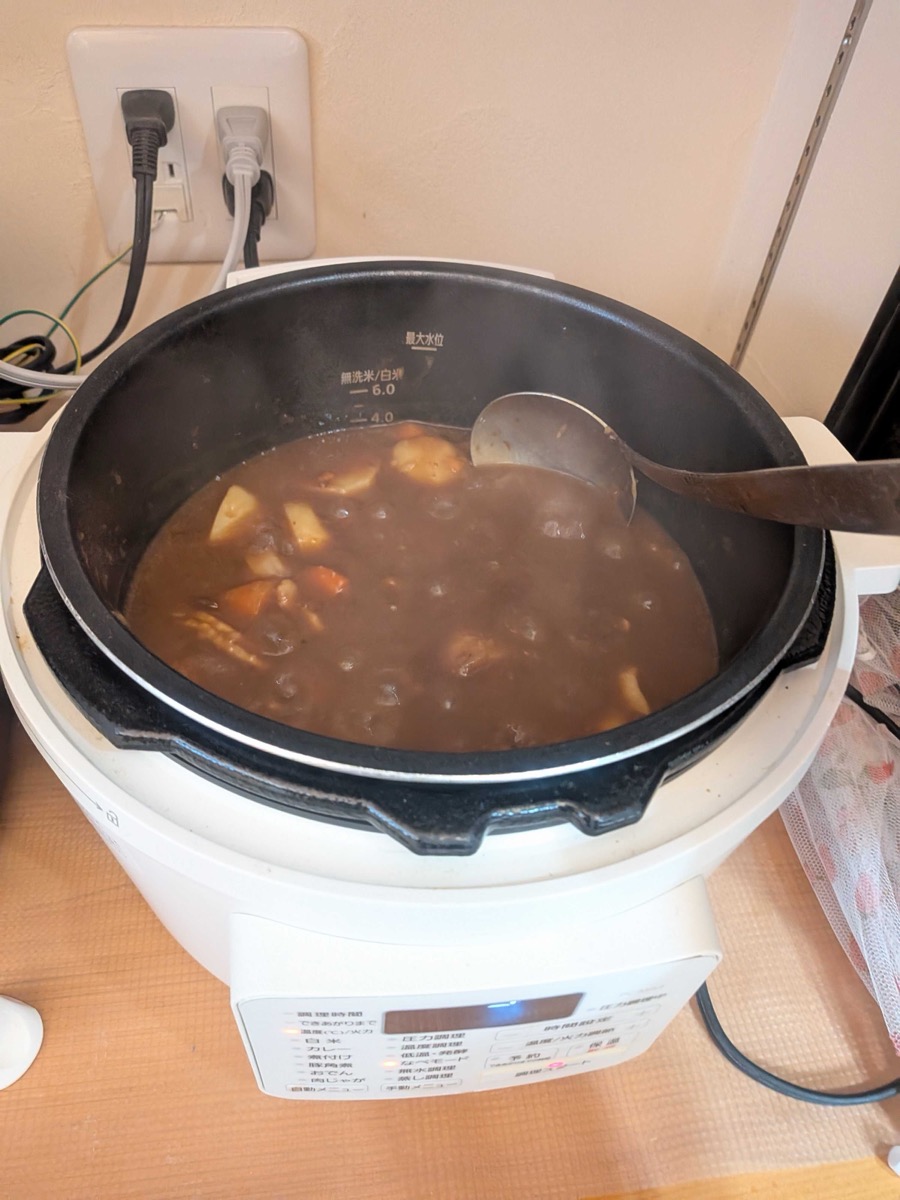
Step 4: Add the Roux
Once the pressure has released and it’s safe to open the lid, you’ll find perfectly cooked vegetables and meat sitting in a clear broth. Now it’s time to add the roux.
Break the roux blocks into the pot and stir until fully dissolved. Switch the cooker to a regular simmer mode (not pressure) and cook for another 5 minutes, stirring occasionally, until the curry thickens to your liking.
Step 5: Serve
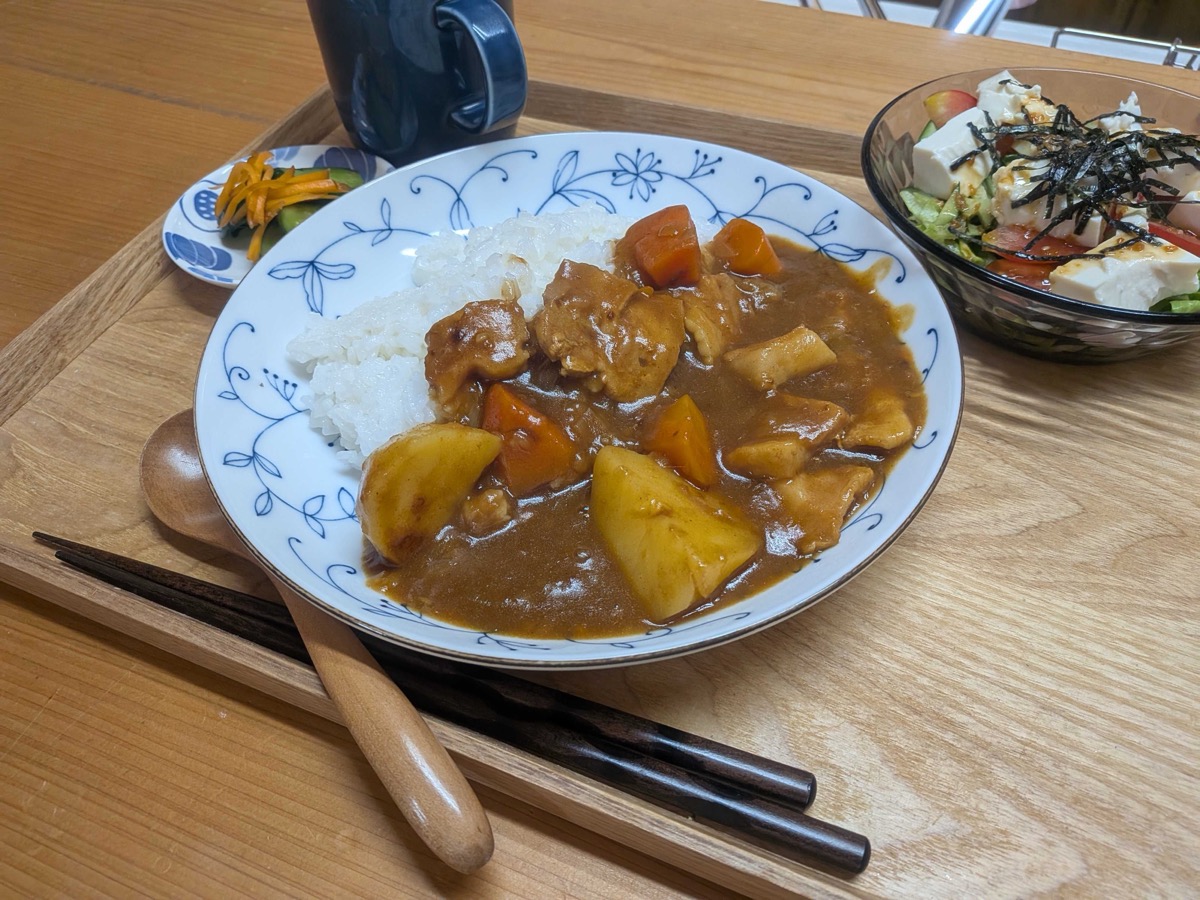
Ladle the curry over steamed white rice. Japanese curry is traditionally served with the rice on one side of the plate and the curry poured over the other half — or just mixed together, depending on your style. I like to keep them separate so you get a bit of both in each bite.
Tips for the Best Pressure Cooker Curry
- Don’t overfill the pot. Most electric pressure cookers have a maximum fill line — stay below it. For curry, 500ml of water plus the vegetables is usually well within limits.
- Add the roux after pressure cooking, not before. Thick liquids like curry sauce can scorch on the bottom during pressure cooking. Always dissolve the roux after the pressure cooking is done.
- Potatoes may soften a lot. Pressure cooking is intense — your potatoes will be very tender, almost melting into the curry. If you prefer them to hold their shape, cut them a bit larger or reduce the cooking time slightly.
- A bay leaf makes a difference. It’s a small thing, but adding one bay leaf to the pot gives the curry a subtle aromatic depth. Worth doing.
- Curry is better the next day. Like most Japanese simmered dishes, the flavor deepens overnight as everything melds together. Make a big batch — and if you have leftover tonkatsu, slice it over the curry for the perfect katsu curry.
What Is Japanese Curry?
If you’ve only had Indian or Thai curry, Japanese curry will surprise you. It’s thicker, milder, and sweeter — almost like a savory stew. The flavor comes primarily from the roux block, which contains a blend of spices, fat, and flour. It’s deeply umami-forward rather than chile-forward.
Japanese curry became popular in the Meiji era (late 1800s) when Western-style cooking was introduced. Over time, it evolved into something distinctly Japanese — and today it’s one of the country’s most beloved comfort foods, right up there with ramen and tonkatsu.
Japanese Curry Rice (Electric Pressure Cooker)
Ingredients
Method
- Peel and cut all vegetables into large chunks. Cut pork into bite-sized pieces.
- Add all ingredients except the curry roux to the inner pot. Pour in 500ml water and add the bay leaf.
- Lock the lid and cook on the curry/pressure setting. After cooking, allow pressure to release fully before opening.
- Break the roux blocks into the pot and stir until completely dissolved.
- Switch to regular simmer mode and cook for 5 more minutes, stirring, until thickened.
- Serve over steamed white rice.