Nikujaga: Japanese Meat and Potatoes in an Electric Pressure Cooker
Japan’s Ultimate Comfort Food — Made Easy
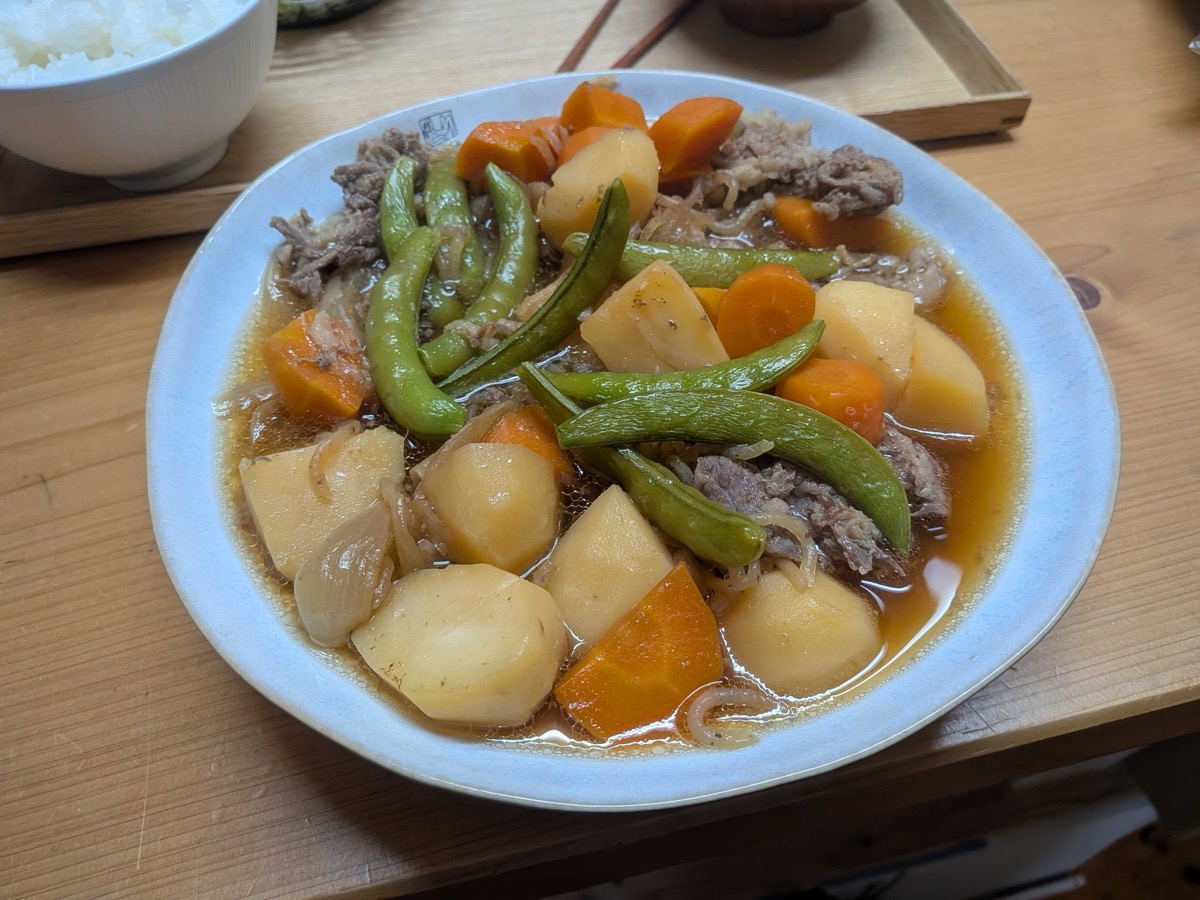
Nikujaga (肉じゃが) literally means “meat and potatoes,” and it’s one of the most beloved home-cooked dishes in Japan. It’s sweet, savory, and deeply comforting — the kind of dish that every Japanese family has their own version of.
Traditionally, nikujaga simmers on the stove for 30–40 minutes. But I use an electric pressure cooker, and the actual pressure cooking time is just 4 minutes. The machine handles everything — I just prep the ingredients, press a button, and walk away.

Ingredients (Serves 4)
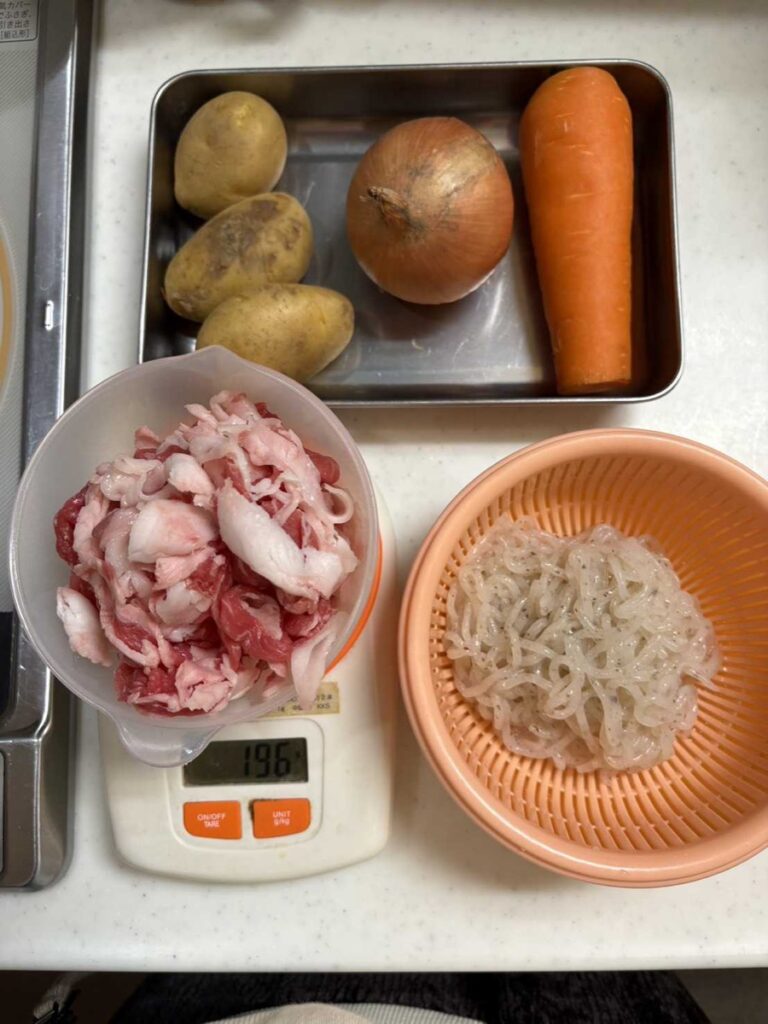
- 200g thinly sliced beef belly (or any thinly sliced beef)
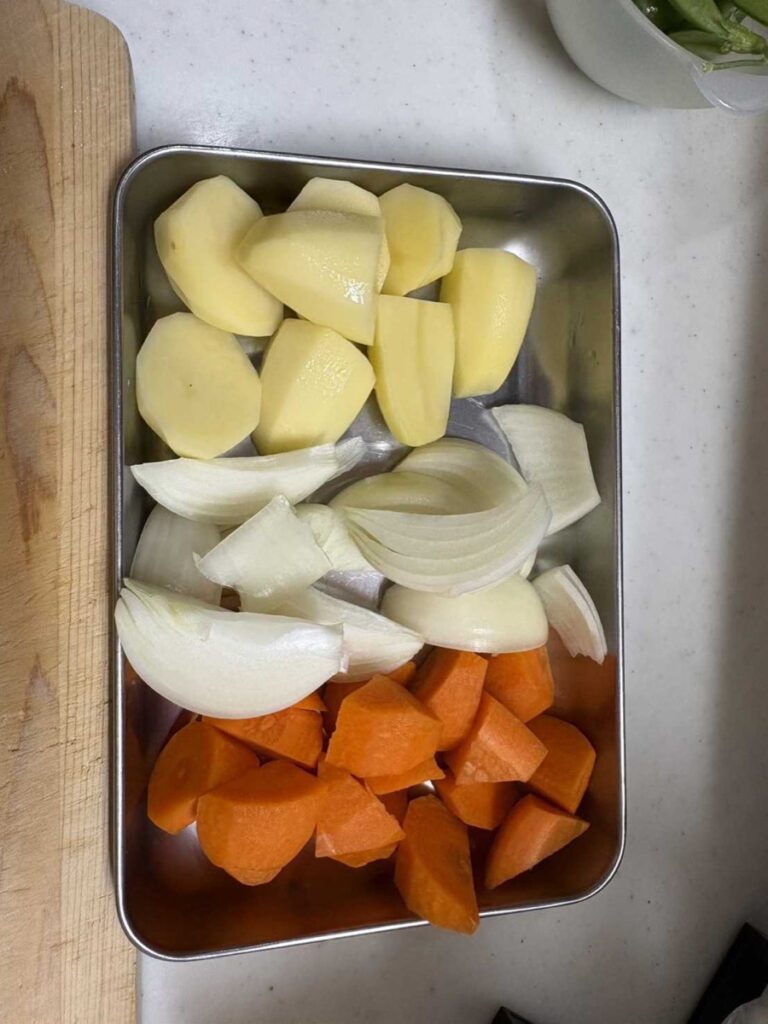
- 3 medium potatoes, cut in half
- 2/3 carrot, cut into bite-sized pieces
- 1/2 onion, sliced into wedges
- 1/2 bag shirataki noodles (konjac noodles), rinsed
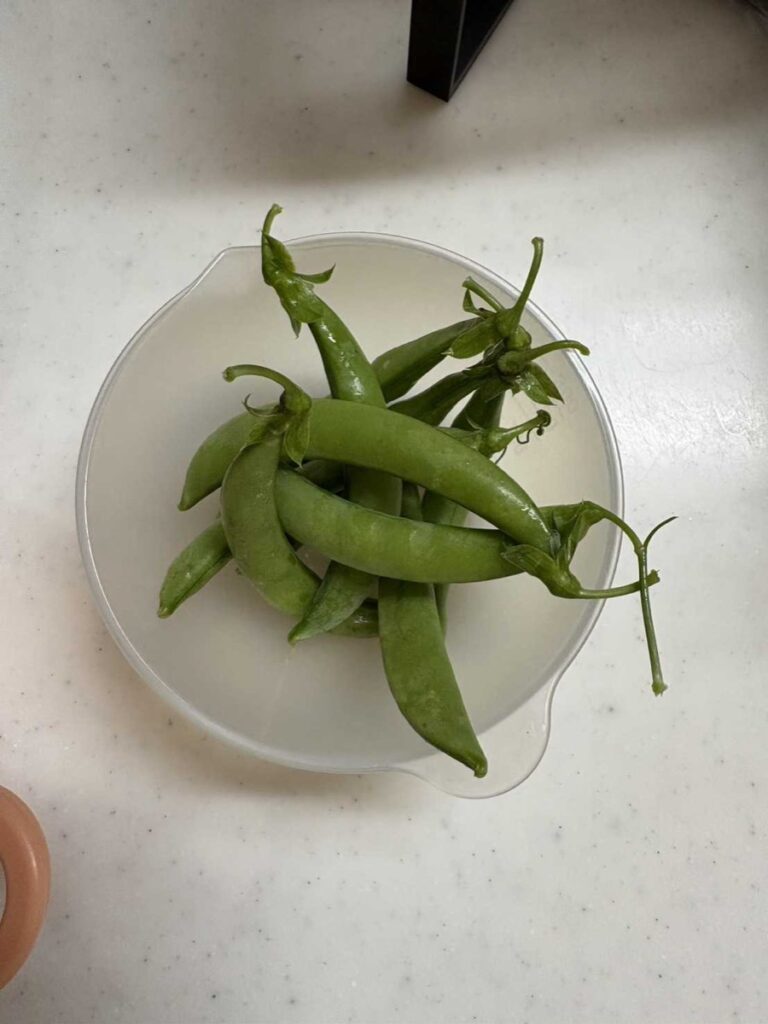
- Snap peas, to finish
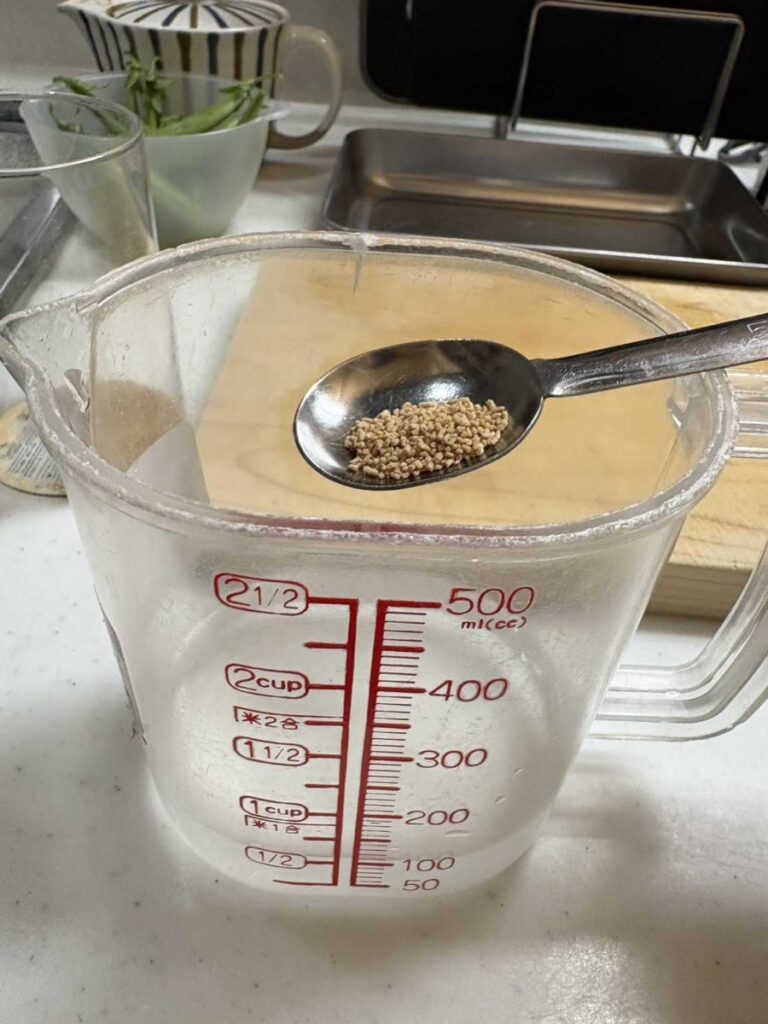
- 100ml dashi broth (from a dashi packet or granules)
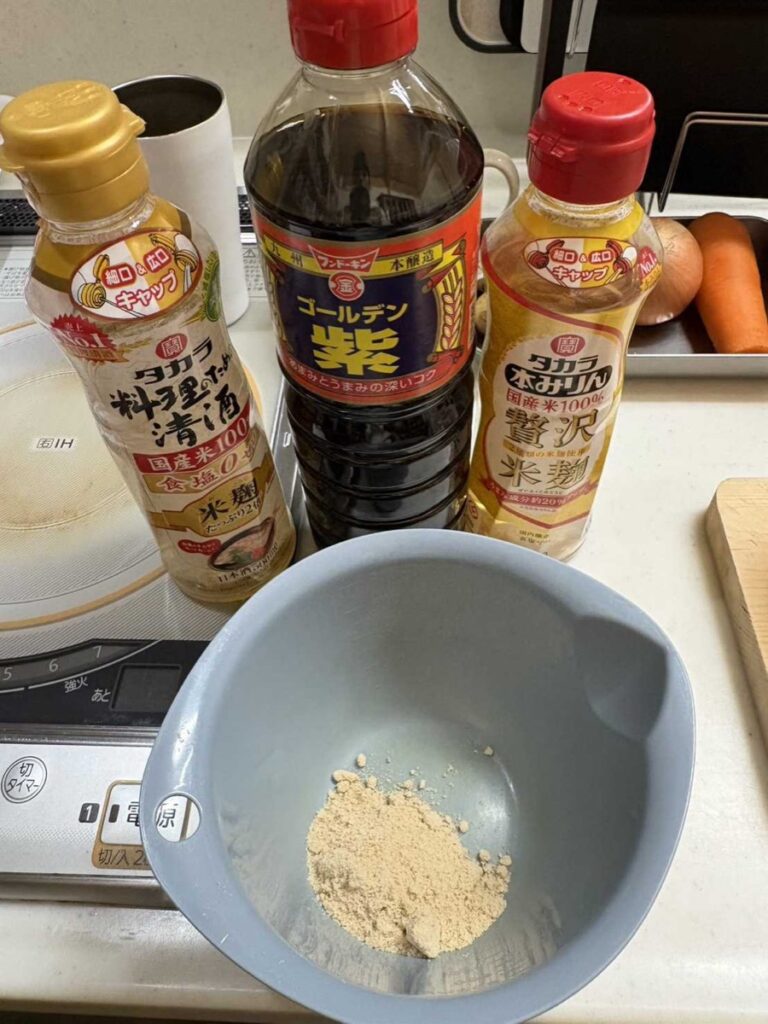
Seasoning
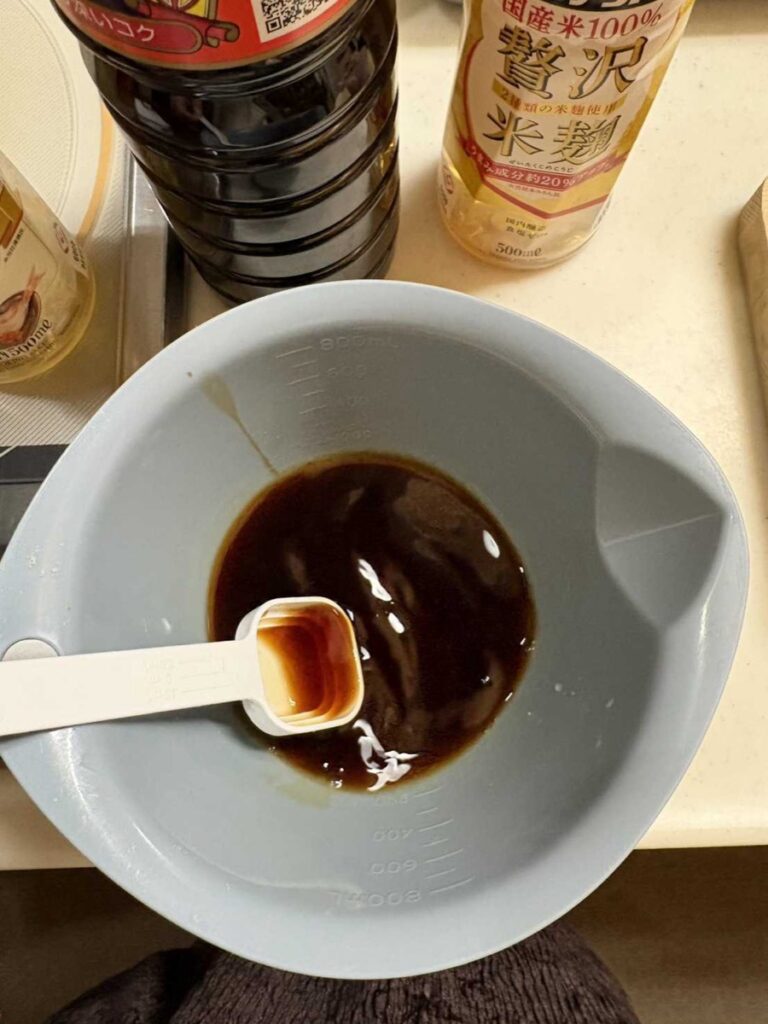
- 3 tablespoons sugar
- 4 tablespoons sake (cooking rice wine)
- 4 tablespoons soy sauce
- 1 tablespoon mirin
How to Make It
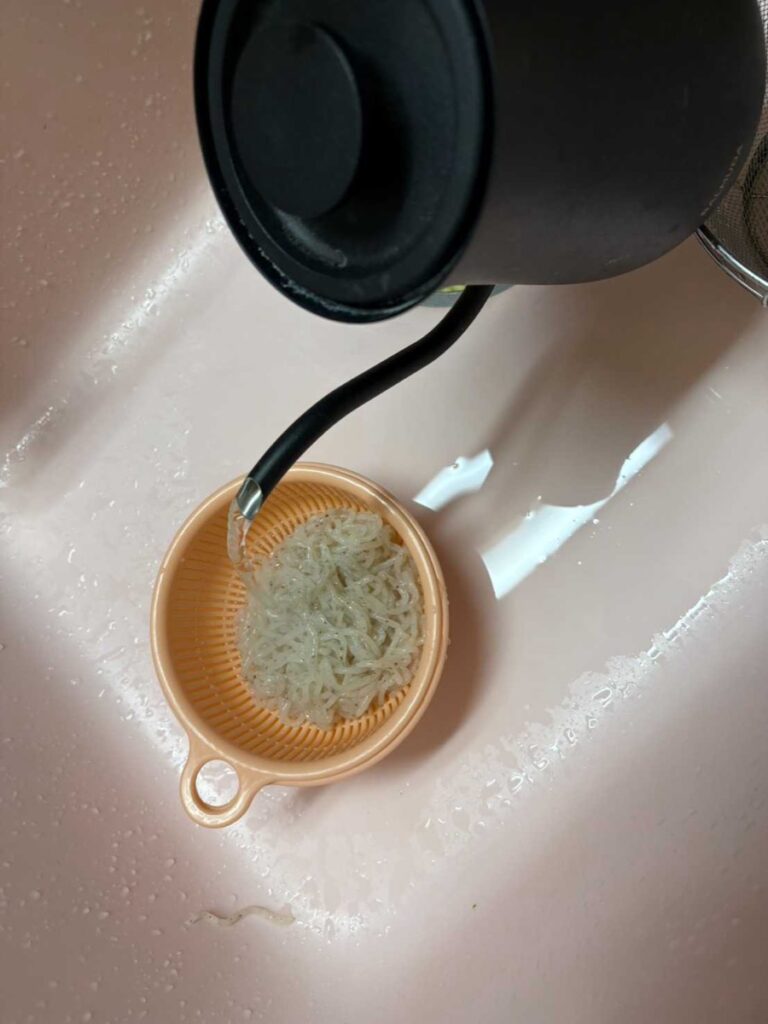
Step 1: Prepare the Shirataki Noodles
Rinse the shirataki noodles and blanch them briefly in boiling water. This removes the slightly odd smell they can have straight from the pack. Drain well.
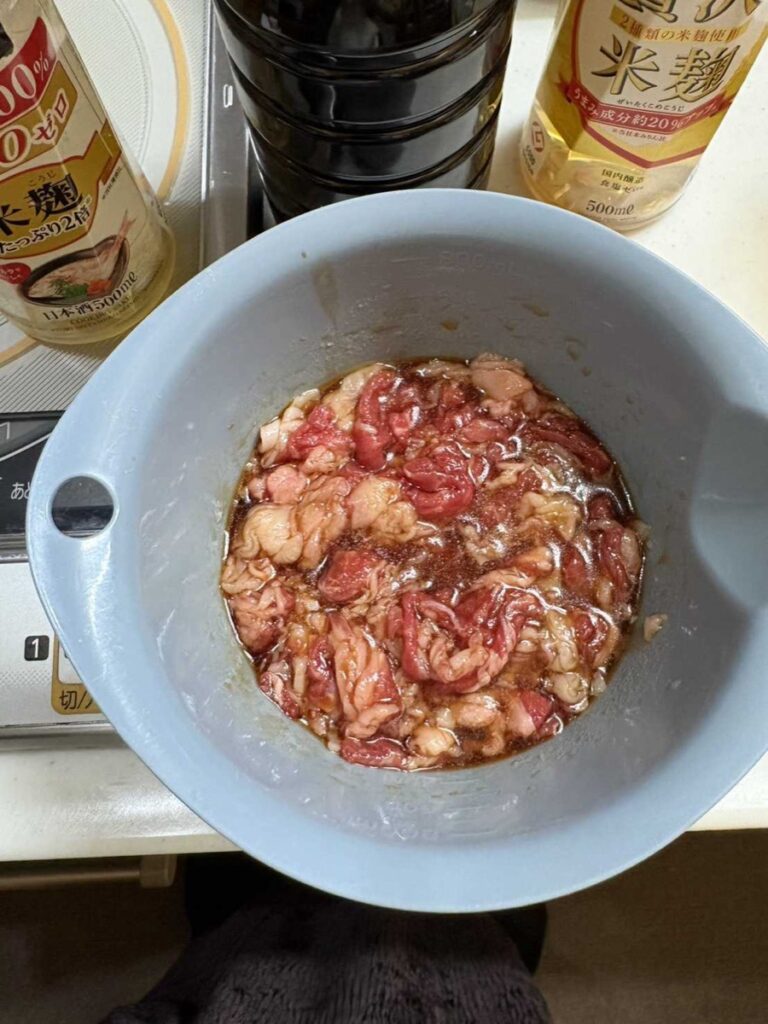
Step 2: Make the Seasoning and Marinate the Beef
Mix the sugar, sake, soy sauce, and mirin together in a bowl. Add the beef and let it sit in the seasoning while you prep everything else — even 5–10 minutes makes a difference to how the beef absorbs flavour.
Step 3: Cut the Vegetables
Cut the potatoes in half. Cut the carrot into bite-sized chunks. Slice the onion into wedges. Keep the pieces large — they’ll hold their shape better under pressure cooking and look good in the bowl.
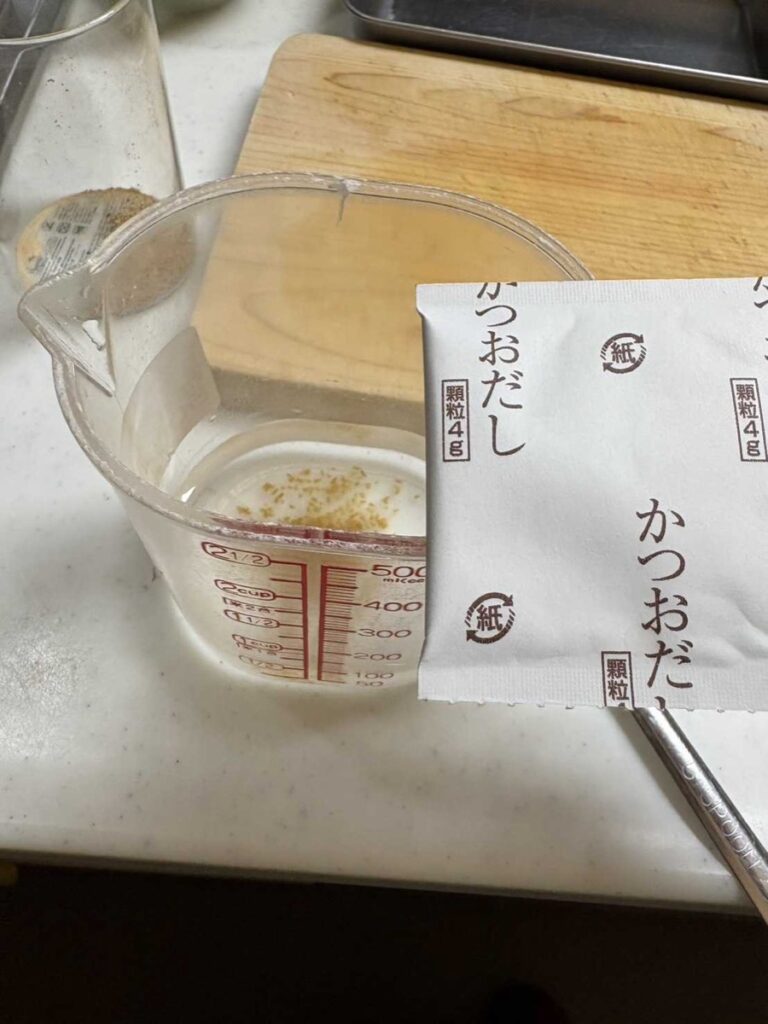
Step 4: Make the Dashi
Dissolve a packet or a teaspoon of dashi granules in 100ml of water. I use katsuobushi (bonito) dashi packets for nikujaga — the flavour works well with the sweet-savoury broth.
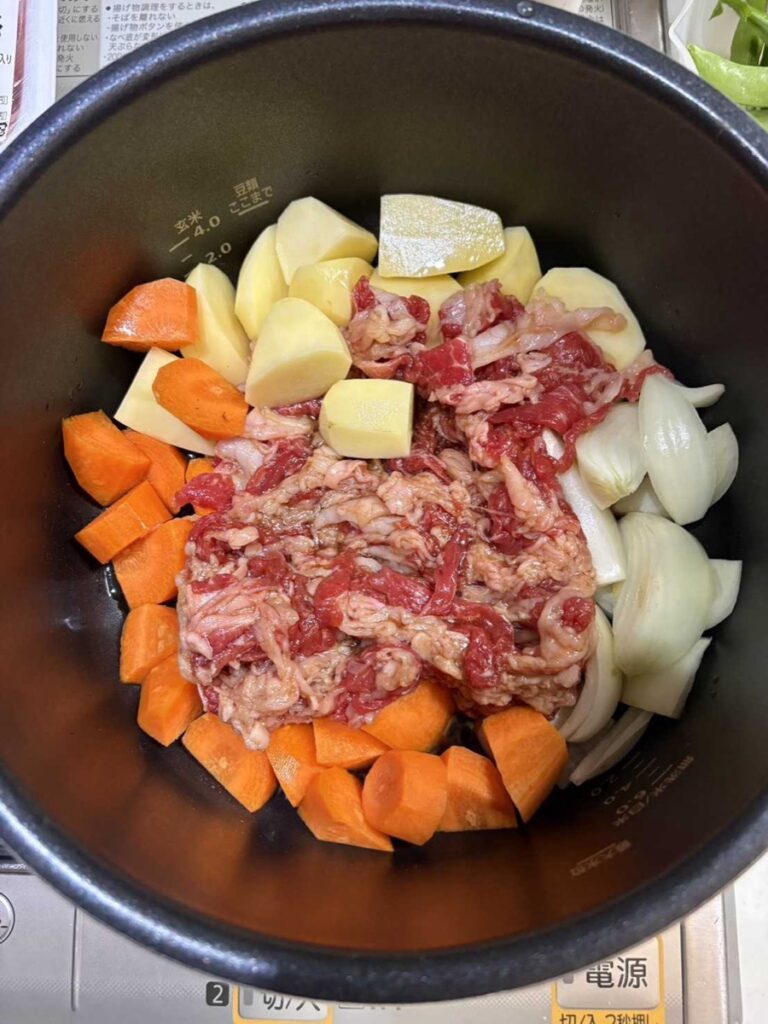
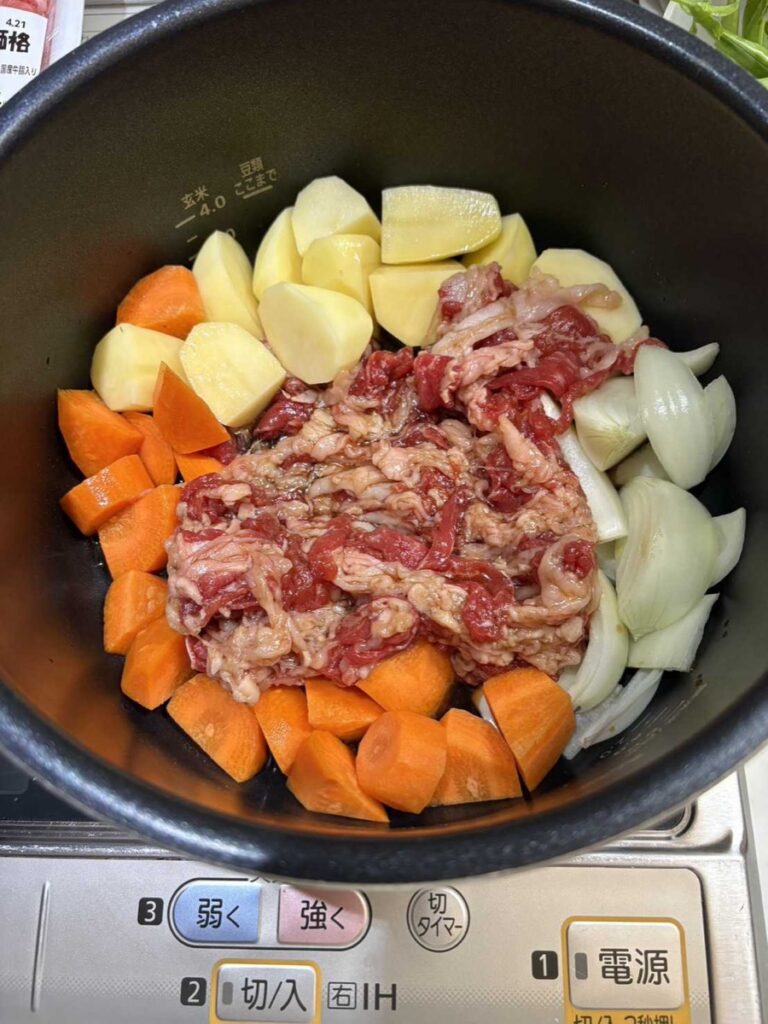
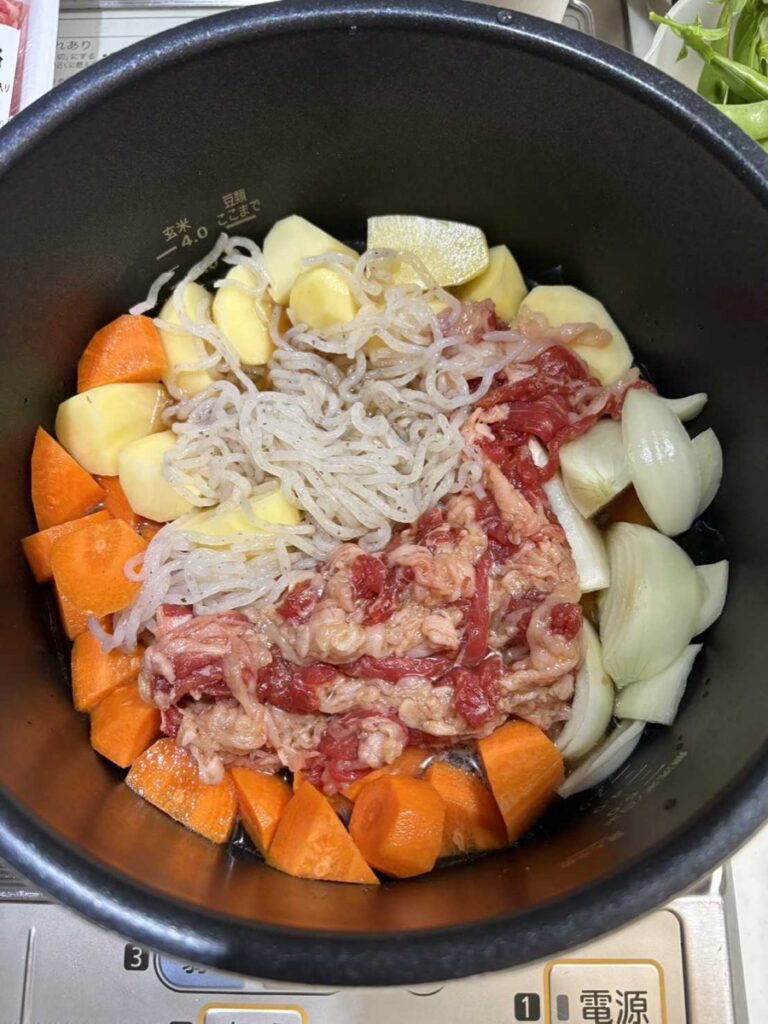
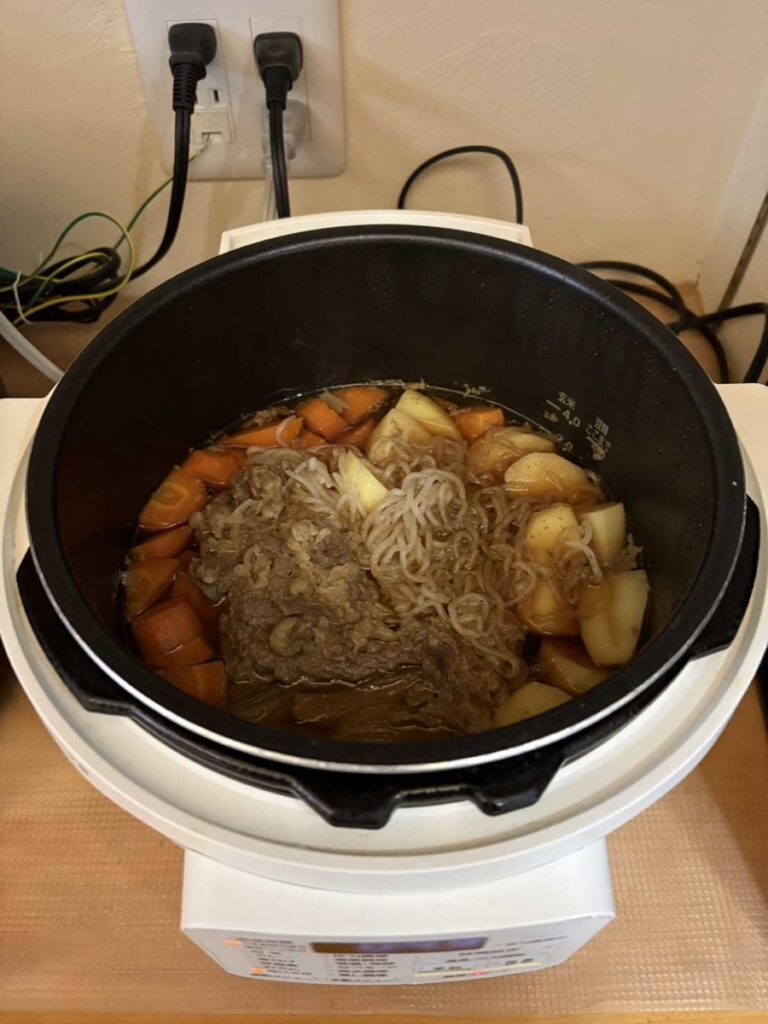
Step 5: Load the Pressure Cooker
Add everything to the inner pot: vegetables first, then the marinated beef with all the seasoning liquid, then the shirataki noodles, then pour the dashi over the top.
Step 6: Pressure Cook
Close the lid and set to high pressure for 4 minutes. My pressure cooker has a nikujaga preset which sets everything automatically — if yours doesn’t, 4 minutes on high pressure works perfectly.
The total time including heat-up and pressure release is about 50 minutes:
- Heating up: ~15 minutes
- Pressure cooking: 4 minutes
- Natural pressure release: ~30 minutes
Don’t rush the pressure release. Natural release lets the flavours absorb into the potatoes and meat — this is where the magic happens. Quick release will leave the potatoes undercooked and the flavours undeveloped.
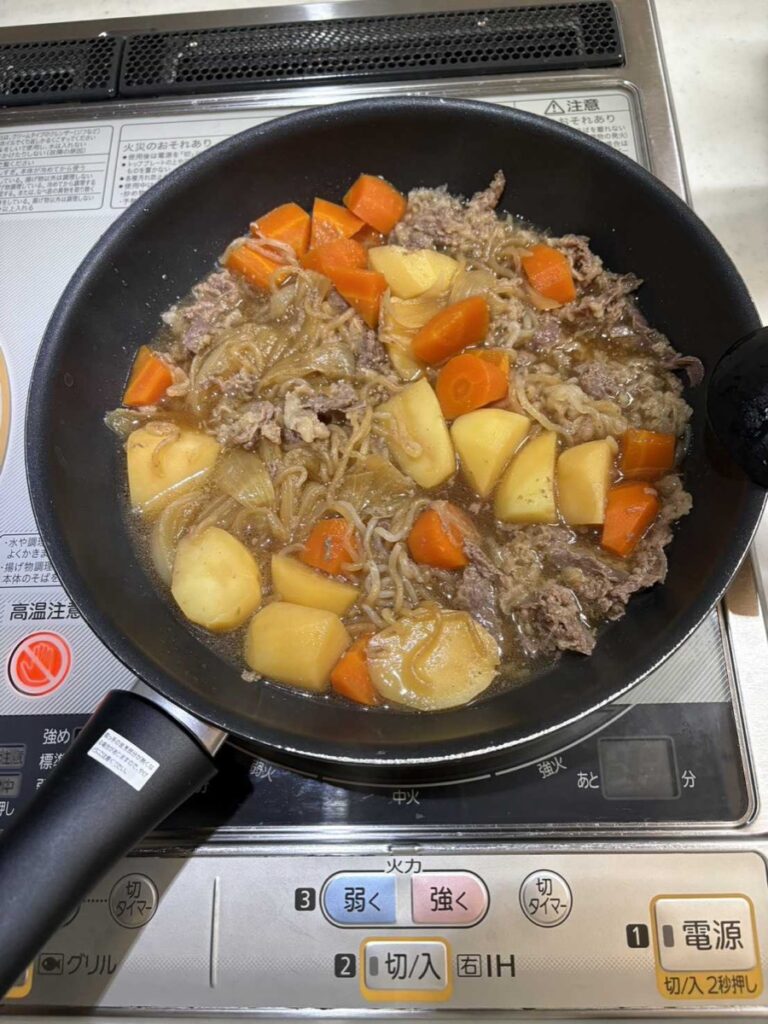
Step 7: Finish and Serve
After pressure has fully released, open the lid. Switch to simmer mode and cook uncovered for about 10 minutes to reduce the liquid slightly and let the flavours concentrate.
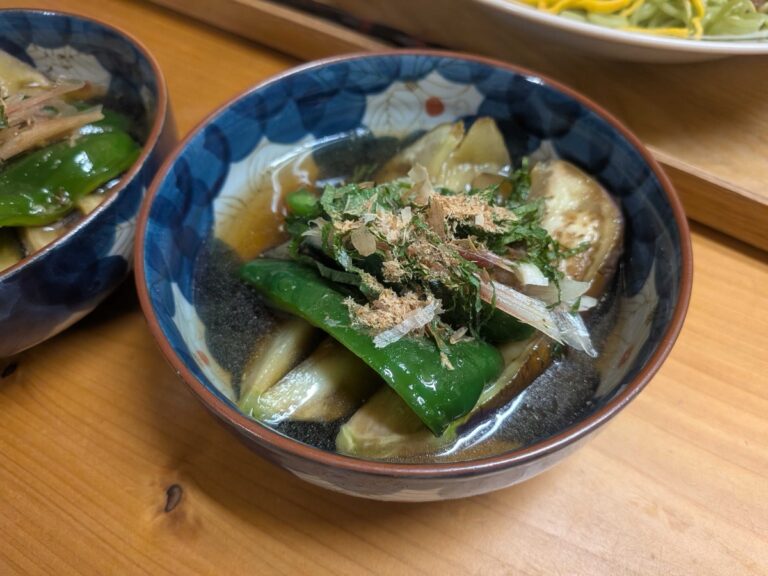
Blanch the snap peas briefly in boiling water — just 1 minute — and place them on top when serving. They add colour and a fresh crunch against the soft braised vegetables.

Why an Electric Pressure Cooker?
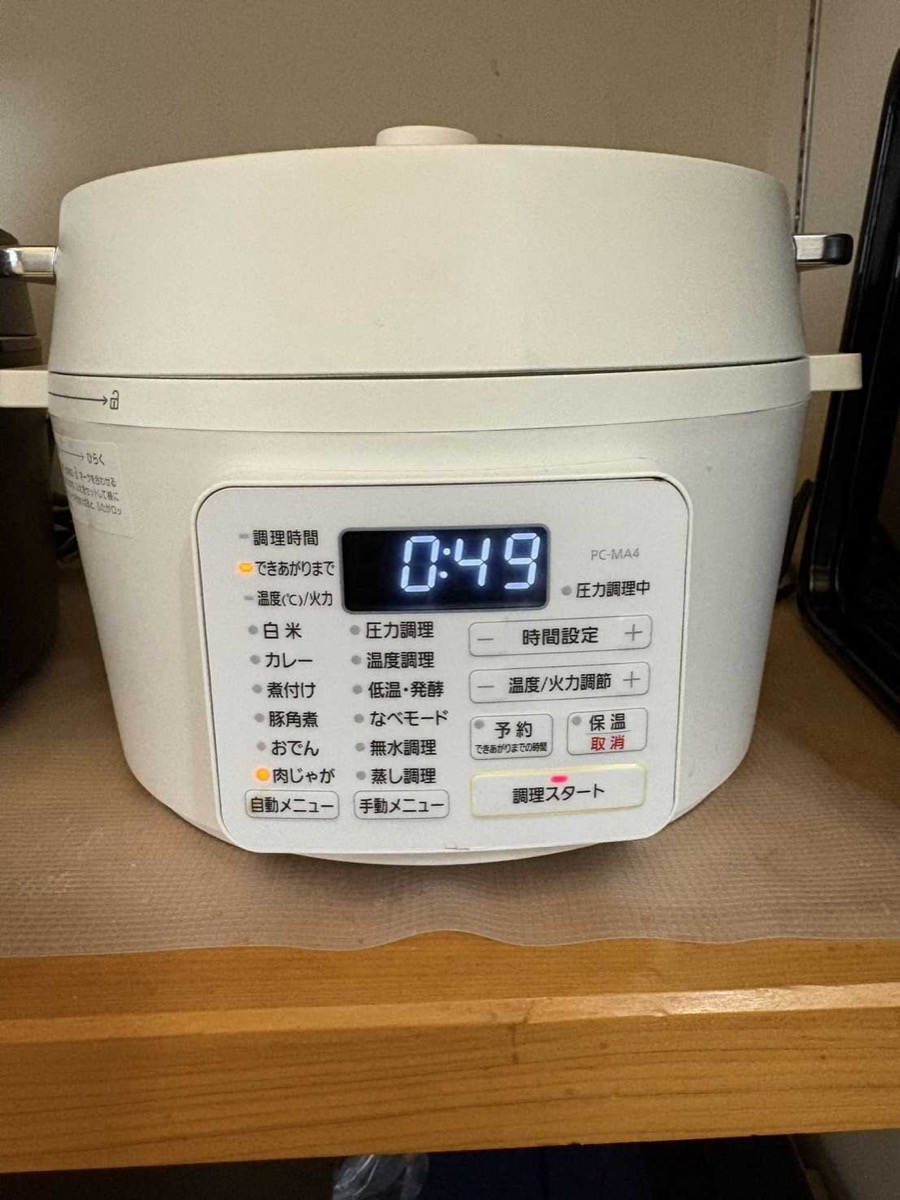
My Pressure Cooker
I use an Iris Ohyama electric pressure cooker (model PC-MA4). It has a dedicated nikujaga preset — just select it and press start. The machine handles everything automatically.
Outside Japan, the most widely used equivalent is the Instant Pot Duo. Any electric pressure cooker with a high pressure setting will work for this recipe — set it to high pressure for 4 minutes with natural release.
You can absolutely make nikujaga on the stove — it’s the traditional way and it works perfectly. But here’s why I use the pressure cooker:
- Hands-off cooking. Press the button and walk away. I use that 50 minutes to make the rest of the meal — miso soup, a side dish, rice.
- Perfect potatoes. Pressure cooking makes them tender all the way through without falling apart. On the stove it’s easy to overcook them to mush or leave the centre hard.
- Incredibly tender meat. Even cheaper cuts come out soft and full of flavour.
- Consistent results every time. No watching, no stirring, no guessing.
Tips from My Kitchen
- Don’t skip the shirataki noodles. They soak up the broth and add great texture. Blanch them first to remove the smell.
- Let the beef marinate. Even 5–10 minutes in the seasoning while you prep vegetables makes a noticeable difference.
- Natural release is not optional. This step is doing real cooking work — the flavours are absorbing into everything as the pressure slowly drops.
- Snap peas go on at the end. Add them fresh and briefly blanched just before serving. They’d turn grey and mushy in the pressure cooker.
- It tastes even better the next day. Make extra on purpose — the leftovers after the flavours have had overnight to develop are incredible.
- Adjust sweetness to taste. 3 tablespoons of sugar might sound like a lot, but it balances the soy sauce. Start with 2 if you prefer less sweet.
What to Serve with Nikujaga
Nikujaga is a main dish, but in Japan it’s always served as part of a full meal:
- Rice — always
- Miso soup — made with whatever’s in the fridge
- A small side dish — cold tofu, salad, pickles, or ohitashi
If you love this style of pressure cooker cooking, my Japanese curry rice uses the exact same approach — dump everything in, set it, walk away. And for a similar sweet-savory simmered dish, try braised daikon and beef next.
This post contains affiliate links. When you buy through links on this site, I may earn a small commission at no extra cost to you. I only recommend products I actually use in my own kitchen.
Nikujaga (Japanese Beef and Potato Stew, Electric Pressure Cooker)
Ingredients
Method
- Rinse the shirataki noodles and blanch them briefly in boiling water to remove the odd smell. Drain well.
- Mix the sugar, sake, soy sauce, and mirin in a bowl. Add the beef and marinate for 5–10 minutes while you prep the rest.
- Cut the potatoes in half, carrot into bite-sized chunks, and onion into wedges. Keep the pieces large so they hold their shape under pressure.
- Dissolve a dashi packet or teaspoon of dashi granules in 100ml of water.
- Load the inner pot: vegetables first, then the marinated beef with its seasoning liquid, then shirataki noodles, then pour the dashi over the top.
- Close the lid and set to high pressure for 4 minutes (or use the nikujaga preset if available).
- After pressure has fully released, open the lid. Switch to simmer mode and cook uncovered for about 10 minutes to reduce the liquid. Top with snap peas and serve.